May 31, 2009

Sheep to Sweater Sunday n° 4 "Carding"

When most spinners consider fiber preparation, the first thing they think about is carding.

Like all methods of wool preparation, carding has some advantages and some disadvantages.
On the plus side :
  • hand cards are relatively inexpensive (approx. 40-50€ per pair) ;
  • there is virtually no wasted fiber ;
  • carding produces a lofty “woollen” yarn ; and,
  • carding is a natural choice for blending colors and fibers together.
So there are a number of positive things to say about carding .... but there are a few down sides too!

The process of carding blends and organizes the fiber for spinning BUT it does not get rid of vegetable matter, second cuts, matts, short fibers, etc... it merely spreads them out in the wool.

So it’s very important to start with clean, good quality wool.
In other words, beautiful in, beautiful out .... and conversely garbage in garbage out!

I have to admit that carding is not my favorite method of fiber preparation. That said, it does have its uses, and I hope to show you some examples of special projects produced using this method in the next few weeks.

For more information on hand carding, check out the following videos :

How To Prepare Fiber With Hand Carders - 3 videos from the JoyofHandSpinning

Wool Carding with Sue Macniven pt 1 YouTube Video

Wool Carding with Sue Macniven pt 2 YouTube Video


Here’s a photo of my current “carding” project (more details too follow!), using combing waste from RhumRaisin and Ciska. By blending brown and white ouessant wool with hand cards, I'm able to produce a "cinnamon & sugar" yarn!


The “traditional” rolag is rolled tip to butt.
I personally roll mine horizontally, keeping the tips and the butt ends together : this creates a fiber “cloud” producing semi-worsted yarn

May 29, 2009

Brown fleeces washed and drying ...

Here they are : Praline and Nougatine's fleeces washed in a week long cold water soak and now drying.

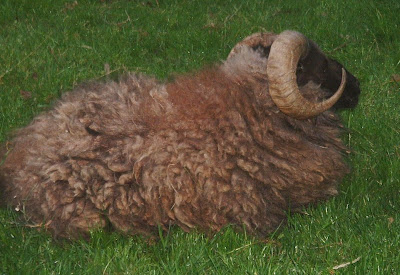
Praline's fleece : Brown (fawn)

Nougatine's fleece : dark chocolate (brown)

What do you think? I think they're just beautiful. Don't know which one I like best. The deep chocolate fleece is so pretty ... but I have to admit that I'm rather partial to Praline's fawn fleece : it's a magical color!

Now I just have to think of something to make with these fleeces that will do justice to their natural beauty! I'm dreaming of a sweater ...

May 28, 2009

Whewww ... I'm just shattered!

... the vet came today to give the first round of Blue Tongue jabs.
He'll be back in 3 weeks for round two.
Only adults got the vaccine ... so will have to use butox on all the lambs.
It all went quickly & well. But tiring nonetheless.

May 27, 2009

Oh how quickly we grow!!!

Mac at 5 Weeks


Frankie at 4 weeks


Clafoutis at 6 weeks


Onyx at 9 weeks

May 26, 2009

Why I coat my sheep!

I have been so very happy with all my coated fleeces this year : both the fleeces that were coated last year at shearing time and those that were coated in December. It is so exciting to have high quality usable fleeces!

My conviction that coating insures the best quality fleece was reinforced this weekend. I was asked to help shear some ouessant sheep in exchange for the fleeces. To be quite honest, I wasn’t expecting to find great fleeces : I’ve seen too many felted ouessant fleeces chucked full of vegetable matter!

We sheared 5 ouessants.
Three of the fleeces are already on the compost heap!
One fleece has yet to be sorted out, but seems to be more or less usable.

The fifth fleece is a perfect example of why I coat my sheep.
It shows the potential beauty and quality of ouessant fleece.
At the same time it demonstrates its vulnerability to environmental ravages.
This is what the fleece looks like on the “outside”.

Ariel's Fleece : sun-bleached tips & vegetable matter

As horrible as this looks, when one opens up the fleece we find a beautiful long 6" staple. The wool is jet black and in perfect, pristine condition for the first 4" with severely damaged 2" tips. Additionally, the undamaged part of the staple is quite lovely and soft to the touch.

Look at that staple length!
But the tips are "burnt", matted and brittle!

What a shame, this could have been the most awesome fleece if it had been coated in November or December. That being said, I was able to salvage approx. 250 grams (8 oz.).
With a pair of scissors, I cut off the 2" tips of the best parts of the fleece. The clean 4" staples were put in net laundry bags then put in cold rain water to soak for one week.

Net laundry bags full of black wool.

Unfortunately, the rest of Ariel's fleece is on the compost heap with the others!

May 25, 2009

A felted fleece for the compost!

Just a few weeks ago Dagobert's fleece seemed perfectly fine.
He's new around here, so no coat.
Then came shearing day!
Tip side of the fleece looks fine :

And butt side looks good too :

But looks can be deceiving!

This fleece has felted together.
Impossible to pull it apart ... it's as though it were stuck together with glue!
This is what happens when you add a little rain, a little rubbing up against trees, and a few lambs playing hop-scotch on you!

Over 90% of Dagobert's fleece went into the compost! I was able to salvage a few hundred grams that I put in a net bag : it's currently soaking in a tub of rain water.
What a shame! ... otherwise a lovely fleece ...
This is one of the reasons that I'm coating my sheep.
Believe you me . . . he'll be getting a coat this winter!

May 24, 2009

Sheep to Sweater Sunday n°3 "From the Lock"

Once your fleece has been washed, you will need to decide how you will prepare the fibers for spinning.

For those non-spinners who are reading, keep in mind that the goal of fiber preparation is to “arrange” all of the individual fibers so that they can be spun into yarn.

First, it must be said that Mother Nature has done a splendid job of arranging wool for spinning. All you have to do is part the fleece when it is still on the sheep. You will see that all of the fibers in the fleece are naturally lined up parallel to each other. For example here’s a picture of a brown (noisette) fleece :


and Margot’s black fleece :


See how each lock contains lots of nicely arranged fiber.

Since the objective of fiber prep is to organize the fibers so that they are parallel to each other, it is to our advantage to work with nature, or at the very least not to mess things up and make more work for ourselves than necessary! This is why I’ve tried to stress the importance of keeping the lock formation of the fleece during washing and drying : it makes later processing much, much easier!

Essentially, there are 3 basic methods of preparing fiber for spinning – spinning from the lock, carding, and combing – with each method presenting a couple of variations. As with anything, there is no right or wrong way of preparing fiber : it depends on your desired results, the particular fleece you are dealing with, the equipment that you have on hand, your skill level, and your personal preference. Of course each method has some draw backs as well.

Today, I’d like to talk about spinning directly from the lock ...

First, this is by far the easiest, least expensive and most straightforward method of fiber preparation.

The advantages of this method should be obvious. The disadvantages depend on the skill of the spinner, the quality of the fleece and the yarn desired. It does require a high quality fleece to begin with. Additionally it requires a certain amount of spinning skill. Finally, the finished yarn may or may not be what you were hoping for.

There are two variations of spinning from the lock : one using no equipment at all, the other using a flicker brush/carder.

First you begin with a lock of wool. If you want to spin directly from the lock, all you have to do is gently open up the lock with your fingers and spin away.

OR. ... you can use a flicker brush/carder to open up the lock.
Hold the butt end firmly then “brush” the tip end.
Now turn the lock around and hold the tip end while you brush the butt end. Then spin.

Note that the objective of both of these methods is to keep the fibers straight and parallel. Additionally the advantage of using a flicker brush is that you are opening up the ends, eliminating any second cuts and short fiber, and removing any bits of “stray” vegetable matter that might be lingering in the lock.

RhumRaisin : Fleece, flicker carding

To be quite honest about it there are few draw backs to this method.
BUT you do have to start with a clean fleece with good lock structure.
This is one of my favorite methods for preparing fiber : particularly because it produces little if any wasted fiber. I haven’t decided yet, but I just may be using the flicker brush method on at least one or two of my fleeces.

In the mean time, check out these two videos on preparing fiber using a flicker brush.

Preparing wool locks from "In Sheep's Clothing"

Short video on using the flicker brush from "The Joy of HandSpinning"

May 23, 2009

All Done!

I'm so pleased! All finished with shearing this year. The last to be done was Margaret : I didn't want to shear her before she lambed ... so it was a bit of a wait.

But what a difference a year can make! Last year her fleece was totally matted/felted. It is currently at the bottom of the compost heap! But this year, not a mat in sight. just a big beautiful fleece (almost looks like bear skin rug!!)

Here it is, all laid out on netting, ready to be put in a cold water soak :

Rather hard to see in this picture, but her fleece is black with lots of redish brown tipping. Additionally, as a 4 year old ewe, she has a lot of greying in the fleece too. So it is a wonderfully colorful fleece.
She was coated in December, so only had a coat on for the past 5 months, thus quite a bit of tipping. Weight of the skirted fleece : 850 grams (30 oz.).

I also wanted to show you Margot's fleece. This is a picture of her fleece after being washed in cold water for 1 week and then dried :

You can see how this method of washing and drying allows you to retain the lock structure of the fleece. And, as you will see, this is important and will help in later processing of the wool. This is a very pretty lamb's fleece. And will be lovely to spin.

Margot's skirted fleece weighed 720 grams going into the cold water soak. After soaking and drying the same fleece weighed 566 grams. A loss of 154 grams (over 5 oz.!) of "sheep grime". So 21.38% of the original weight was lost in a cold water wash.
I'm keeping records on the other fleeces to see what the yield ends of being after washing.

May 22, 2009

Another batch of wool in the tub!

Today I started processing Praline and Nougatine's fleeces. First, I carefully arranged Praline's fleece on netting. Then, on a different piece of netting I arranged Nougatine's fleece. I layered the netting/fleeces in my wash tub : Praline's on the bottom and Nougatine's on top, separated by netting, of course!

Both of these fleeces look so beautiful that I almost hate pouring all that rain water on them!

Two Dry Noisette (Brown) Ouessant Fleeces

Eight gallons of water later :

Oh Dear!! "Sheep Soup"
Fortunately it will all come out in the wash!

...Cold water wash, that is!

The lid's been closed . . . hopefully next week we'll find two beautifully clean fleeces.
Can't wait!

May 21, 2009

Lamb games : Hop Scotch!

Some people just have a way with kids.
And some sheep just have a way with lambs!
Take Dagobert for example :

The ultimate in "zen" rams

. . . just minding his own business!


Mac & Cass, always ready for a little fun!

. . . and just who should happen along?

Mac on top!

For a little round of hop-scotch!

May 20, 2009

Margaret & Emily

Early Monday morning I found a sweet ewe lamb happily wagging her tail as she was having her breakfast!

Introducing Emily .... the latest little arrival ...

Emily : née 18 mai 2009, wt. 1 k 500 grams (2 days old in photo)
Mum, Margaret in background, ... still in her coat, watching over Emily

Both mum and lamb are doing well.

May 17, 2009

Sheep to Sweater Sunday n̊ 2 "Washing Your Fleece"

One little caveat before I go any further. There are a number of different ways to process fleece. What I’m sharing with you here are my preferred methods of processing ouessant fleece. As with anything, there are pros and cons with any technique (and I’ll try to point these out as we go along), but so far I’m VERY pleased with the results that I’m getting.

To a large extent I’ve arrived at this through trial and error. Even though I’ve been spinning and knitting for over 25 years – and have a “certain amount of skill” and experience – I wasn’t at all satisfied with my attempts at processing ouessant fleece last year. I felt as though I wasn’t doing justice to the fleece. In short, I was very frustrated!

But that didn’t stop me. After much experimentation, a few disappointments, some helpful advise from fellow Ravelry members, and lots of determination ... I think that I’ve finally come up with a set of techniques that seem to work beautifully for ouessant fleece.

Alright, so now you have a quality ouessant fleece (step n̊ 1), but where do you go from here?

. . . on to step n̊ 2! LOL!!

At this point you have to decided whether or not you want to wash your fleece before spinning. This question is not as obvious as it might seem. You can spin raw, unwashed fleece, even if most spinners prefer working with washed/scoured wool.

Globally speaking you have 3 different choices :

  • You can spin raw, unwashed fleece. Then wash/scour the skeins of spun wool. I did a fair amount of this last year with mixed results. The yarn just wasn’t what I was hoping for. Somehow I felt like I was missing out on something. That said the big advantage of this method is that there is basically no fiber prep at all ... but in my opinion the results mitigate this advantage.
  • You can wash and fully scour your fleece in hot water and soap. This method removes all suint, which is a natural grease formed from dried perspiration found in the fleece, and lanolin. Remember that sheep’s wool is made up of both suint and lanolin : two different things! This leaves a “dry” fleece with no natural lanolin in it. This method is particularly recommended for extremely “greasy” fleeces like Merino or Rambouillet. I used this method with some of my ouessant fleece last year. On the whole I felt that I was over-processing the fleece. The fleece seemed too dry and almost damaged. Even so, the resulting yarn was nicer than spinning raw, unwashed fleece.
  • Finally, you can soak your well-skirted fleece in cold rain water. As an interesting side note, this is how ouessant fleeces were traditionally processed on the Island of Ouessant. The fleece is left in cold rain water for 7 days. No soap, no agitation. Nothing! We let nature do our work for us. During this cold soak, the suint (and dirt) breaks down and “washes” out of the fleece, leaving behind a beautifully “clean” fleece that still retains the natural lanolin found in the fleece. This is a particularly appropriate method for washing ouessant fleece, as it is a fleece which naturally contains little lanolin. I absolutely LOVE this method of washing fleece. It’s much easier than the hot wash option, the wool comes out looking gorgeous, and the yarns produced using this method are exceptional!
RhumRaisin's fleece in cold rain-water soak
Note the tied corners of the netting

First of all, on a 1 m² piece of nylon netting I carefully arrange the wool, keeping fleece structure and lock formation intact. A thin nylon cord is tied to each corner of the netting : this allows me to lift the whole fleece at one time, keeping the structure of the locks and fleece intact ... as you will see, this is important for later processing!

I put the fleece/netting in an 80 litre plastic tub filled with rain water, being careful that the fleece stays in the "net basket".

Please note : don't stir or agitate the wool. Just let it soak. Do put a lid on the tub to keep out bugs and flying bits of vegetable matter! After 7 days, carefully lift the "net basket" of clean, wet wool out of the tub. The water will look somewhat like this :

Yummy!!! : Dirty "sheep water"

At this point, I put the "basket" of wet fleece in a "new" tub of clean rain water for a one-day rinse/soak.

RhumRaisin : Final rinse/soak

After a one-day rinse/soak, lift the net basket of fleece out of the tub and without disturbing the lock structure of the fleece, put the wet fleece on a drying screen in the shade. It can take a bit of time to dry. I usually leave the screen/fleece outside to drip dry for at least one day ... then I often move the damp fleece to a drying rack in the house. Generally speaking I try to keep the fleece on its netting until it is completly dry : this makes it easy to move the fleece without messing it up.

Drying screen : RhumRaisin in the foreground ; 'TitBijou in the background!

This is Mother Nature's way of washing a fleece : no harsh chemicals. Just pure, cool, natural rain water. This is actually a very easy process. And it does produce beautiful results.
Of course this isn't really much of an option for apartment dwellers ... but if you have some outdoor space, do give it a try! I'm sure that you'll be amazed at the results!
Next week we'll look at step n° 3!

May 10, 2009

Sheep to Sweater Sunday n°1 "The Fleece"

I thought that it might be fun to reserve Sundays for a special column that I’d like to call « Sheep to Sweater Sunday ». I’d like to set aside this time/space to show you how I process ouessant fleece. This is also where I’ll keep you up-to-date on the fiber projects that I’m currently working on.

So let’s start at the beginning.

The fleece!

Actually I could go on for hours about fleeces. But for right now, let’s stick to the basics!

Ultimately the success of your final creation is dependent on the quality of the fleece that you start with!

So what is a good fleece?

Admittedly, different spinners look for different things in a fleece.
But here are a few things that I consider essential :

  • Good staple length & strength : Personally I prefer a staple length between 4-5 inches (10-13 cm), with the minimum being 3 inches (7.5 cm). Additionally it’s important to make sure that there’s no problem with wool break.
  • A well skirted fleece, with all low-quality, short wool (belly wool, etc), tags, manure, etc... removed.
  • Few if any second-cuts. They are a pain when processing a fleece. That said, speaking as someone who shears their own sheep, second cuts are, to a certain extent unavoidable. But the shearer should be careful to remove any second-cuts from the fleece before rolling and storing. It doesn’t take much time to do this and it makes processing the fleece a lot easier.
  • Very, very little vegetable matter, if any at all. A bit of straw here or there isn’t a problem as long as it’s a big piece that is easily removed. The worst by far is vegetable matter that looks like finely chopped hay or straw. It’s virtually impossible to remove during processing. It is true that combing a well scoured fleece does help with this. But honestly, it’s easier to start with a good fleece to begin with.
  • No cotting or matting. Unfortunately a matted or cotted fleece is destined for the compost heap! You just can’t spin a felted fleece! Cotting is very common in ouessant sheep. I believe that one aggravating factor is the fact that many breeders shear too late. Think about it : if you have a lamb born in March 2007, but don’t shear until June or even July 2008, the fleece has been on the sheep for 15-16 months. Add a nice dose of rain, lots of rubbing up against trees and having lambs jump up on your back ... well, in short it’s a recipe for a felted sheep and a wasted fleece.
That’s what I look for in a fleece ... and this is one of the reasons why I coated my sheep this past year. Coating has given me some lovely fleeces : no cotting, no vegetable matter, beautiful staple length, and exceptional "condition" and wool quality. But more on coats later ...

Here are a few examples of what I consider high quality ouessant fleeces ... and yes, they are from my little flock!

Noisette (brown) -- light to medium fawn ouessant fleece
Praline's fleece : skirted, tip-side up

coated last 5 months of the year (since December)

White ouessant fleece
RhumRaisin's fleece : skirted, tip-side up
coated since shearing last spring

Noisette (brown) -- dark chocolate brown ouessant fleece
Nougatine's fleece : skirted, tip-side up
coated last 5 months of the year (since December)

May 7, 2009

baa, baa brown sheep have you any wool?

. . . well, not anymore!
Just sheared both Praline and Nougatine.
And look at these fleeces!

Nougatine's dark chocolate brown fleece
Praline's medium fawn fleece
Note : this shows the cut/butt end, sun-bleached tips are hidden
(there is just a small staple sample on top)


What can I say? Aren't they just beautiful!
These skirted fleeces weigh in at 622 and 624 grams respectively.
So pretty average for an ouessant ewe.

Both of these ewes were left uncoated for 7 months after shearing.
Then in December they were coated until shearing (5 months).
This explains the sun-bleached tips.

I'm considering coating Nougatine this week :
I would love to have a solid dark chocolate brown fleece next year with no bleached tips!

May 1, 2009

Shearing Update

This week I sheared both ‘TitBijou and RhumRaisin.
I tried both the mohair comb and the "chattle".
I really didn’t like the mohair comb : didn’t seem to work well at all.
Maybe I’ll have to try again later?

On the other hand I LOVE the “chattle” comb. It is definitely slower, but no nicks or cuts. And the sheep come out looking like velvet! Very, very pleased. It does take me roughly 20-30 minutes to shear a sheep, so I’m not winning any contest there! But that’s okay!

There is another problem that I hadn’t really considered : the comb and blades really do get dirty and clogged with “sheep grime.”

YUCK!

I didn’t have any problems shearing one sheep .... but I had to stop and clean the comb and blades before shearing the next sheep.

Fortunately, they do clean up very quickly and easily.

Nothing like a sparkling clean comb and cutting blade!

I unscrew the comb and blades, then soak them for a few minutes in “White Spirit” ; I use a small brush to wipe off any lingering grime ; a little soap and water to get everything squeaky clean ; then dry with towel before remounting the comb and blades!

Actually much faster and easier than it sounds!

So all in all, I'm very pleased with the "shattle" comb. It does a lovely job and it has made shearing less stressful for both me and the sheep. And even though they are a bit slower than the standard comb, I think that for me it takes less time using the chattle. I know that doesn't sound logical but last year I was so terrified of cutting the sheep that it took me a long time to shear each one. So this is progress!

Thank you for visiting the Spinning Shepherd!